WordPress Cloud Hosting made easy with Cloudways
In this article, we will talk about the best managed cloud hosting for WordPress. We will talk about Cloudways and how to host your WordPress websites in Cloud.
Cloudways is a leading provider of managed cloud hosting, offering an effortless solution for hosting WordPress websites. With its user-friendly interface and robust infrastructure, Cloudways makes it easy for individuals and businesses to leverage the power of the cloud for their WordPress hosting needs. In this article, we will delve deeper into the features and benefits of Cloudways, exploring why it stands out as the go-to choice for seamless WordPress cloud hosting.
This page contains product affiliate links. I receive a small commission if you make a purchase after clicking on one of these links. This comes with no extra cost to you.
About Cloudways
Cloudways exists to support customers. More than 80K+ agencies, SMBs, and individuals rely on them to save time and money so they can focus on their passions and grow their businesses.
The Cloudways platform features >99.9% uptime, super fast page load time, pro-active app monitoring, dedicated workflows, leading security including add-ons from Cloudflare, and 24/7 premium support.
Cloudways has industry-leading customer support ratings, exceptional value for money, and a diverse choice of plans from leading providers that include Google Cloud, DigitalOcean, and AWS.
Founded in 2012, Cloudways has 280+ employees from 20+ countries, all of them focused on serving and supporting you.

Why is Cloudways the best managed cloud hosting for WordPress?
Cloudways Platform is a simple yet powerful managed hosting platform. They place a strong emphasis on choice, performance, simplicity, and support.
Here are some strong points that Cloudways has:
- Freedom of Choice – Find the flexibility you need with 5 industry-leading cloud hosting providers, infrastructures, and unlimited applications… All without a contract.
- Optimized Performance – Get supercharged cloud hosting performance with top-of-the-line technologies and an optimized stack, including advanced caching and Cloudways CDN.
- Simplicity – Enjoy hassle-free cloud hosting with 1-click app migration and managed server and data security.
- Security and Reliability – They offer a worry-free experience, with managed security, automated backups, 24/7 real-time monitoring, and more.
- 24/7/365 Expert Support – Take advantage of extensive managed support with live chat, Cloudways SLA-based ticketing system, a wide-ranging knowledge base, and their helpful community.
- No Long-Term Contract – Why enter into a contract or pay a fixed amount? Cloudways offers a pay-as-you-go payment model, allowing you to pay only for what you’ve used.
WordPress Cloudways Setup
Before going forward and seeing how to set up Cloudways setup, you must create a new account. Creating a new account is fast and easy, go to Cloudways and click on Start Free. Initially, you don’t need to worry about providing your credit card information. You can use the service for 3 days and not pay for anything. Use this time to create your WordPress website, test it out, and upgrade your account to a pay-as-you-go account if you are happy with the results.
Launch New Server
Launching a new server with Cloudways is easy, fast, and fast-forward. After we log in, we go to the Servers section and have a few options to deploy a new server.
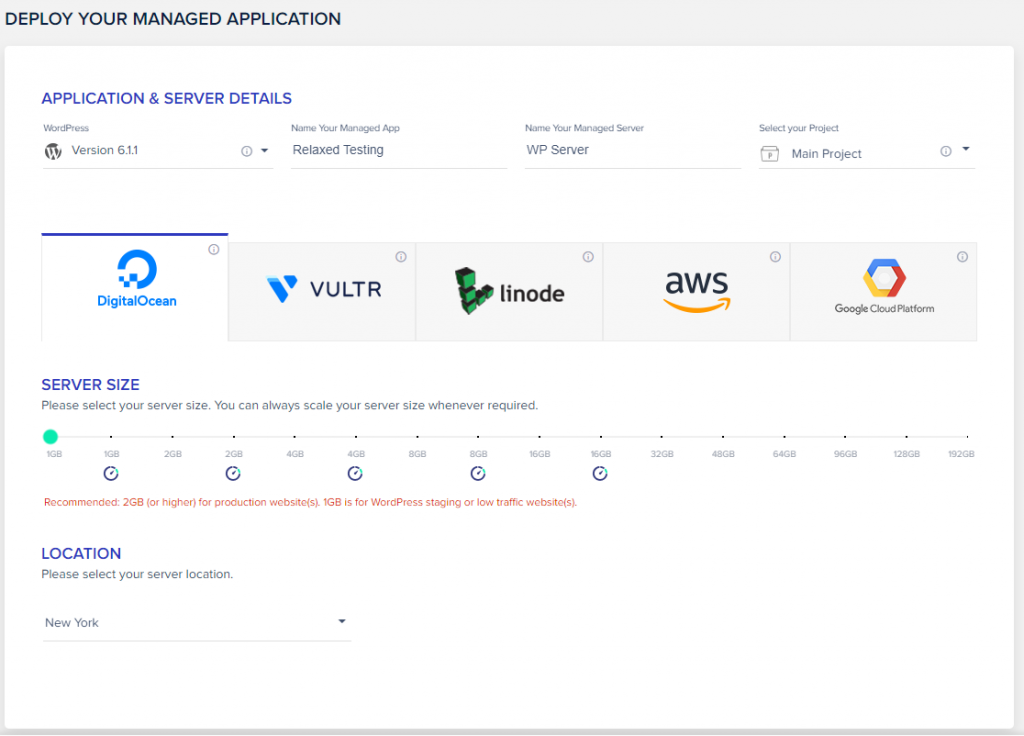
In our case, we will deploy a WordPress application, so in the first section we will choose WordPress as the application we will deploy.
In the second step of the server launching, we can choose what Cloud provider we want to use for our server. Cloudways is offering currently five cloud providers to choose from DigitalOcean, Vultr, Linode, AWS, and Google Cloud Platform. For our example, we will choose DigitalOcean as the cloud provider.
In the third step, we can choose the size of the server we want to launch. Bear in mind that if you want to have multiple WordPress websites you can have so on one server. Choose the size of your server based on how many visitors you expect to have for your website. For this example, I went with the smallest instance.
In the last step, go ahead and choose the location where you want to launch the server. The locations depend on the Cloud provider you chose in the second step.
The last thing remaining to do is to click on Launch Now and wait for the provisioning of the server.
The deployment takes around 5 to 7 minutes.
Domain Management
When we go to Applications / Access Details we can see that our application has an available URL from where we can access our WordPress website. The URL looks something like this https://wordpress-[random number]-[random number].cloudwaysapps.com/. What we are going to do next is to have our WP website accessible from an actual domain.

Go to Applications / Domain Management and add your primary domain.
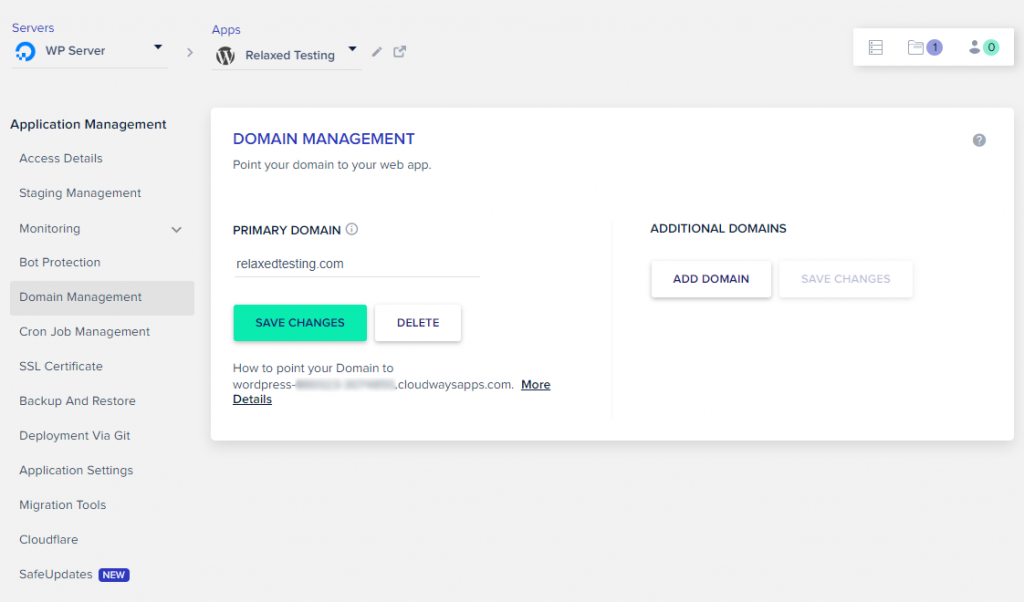
Now we need to point our domain to the Cloudways server. If you click on more details in the section above, you will have a tutorial on how to set up DNS.
When you acquired your domain you used a Registrar. In my case, I have used Namecheap . You have two options to manage DNS with Namecheap . Free DNS – keep your online presence. FreeDNS hosting makes sure your domain is visible to the Internet, and with secondary DNS backup avoids any gaps in your website’s availability. The second option is Premium DNS – this service will always be on duty, easily able to monitor and intuitively secure DNS hosting on your behalf. Get DNS Security Extensions (DNSSEC) support to combat DNS attacks, super-fast DNS speeds with global Anycast servers handling the busiest of websites and your queries, and your website 100% available — for one hugely affordable price–per–year. Forget about lost connections and data leaks. Advanced DNS security with PremiumDNS has you covered. Don’t worry about the price of Premium DNS, at the moment is under $5/yr.Go to your Namecheap account, choose to manage the domain you want to configure, and then Advanced DNS. Here we will configure the DNS Records that will resolve our domain. You should have something like below. Just add your IP address and replace relaxedtesting.com with your actual domain. You can find the IP Address of your server in Cloudways under Access Details / Public IP.

SSL Certificate
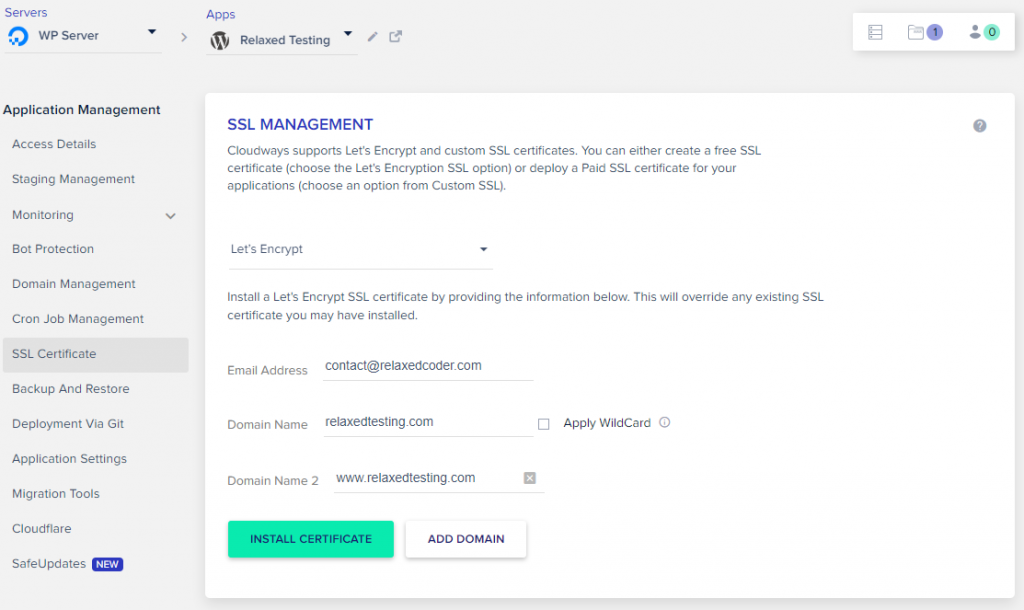
At this point, we have the WordPress website up and running but we cannot access it from HTTPS. Not serving the website via HTTPS exposes it to some security issues. For configuring the SSL/TLS we have two options. Use Let’s Encrypt or import an SSL Certificate from an outside provider. If you want to use a paid certificate I recommend using certificates from SSLs .com.To set up SSL with Cloudways , go to Applications / SSL Certificate, choose Let’s Encrypt, and provide an email address and your domain name. In this step, you can choose to protect multiple domains/subdomains with the same certificate.
Let’s Encrypt certificates expire after 3 months, don’t worry, Cloudways has the option to auto-renew the certificate before it expires.
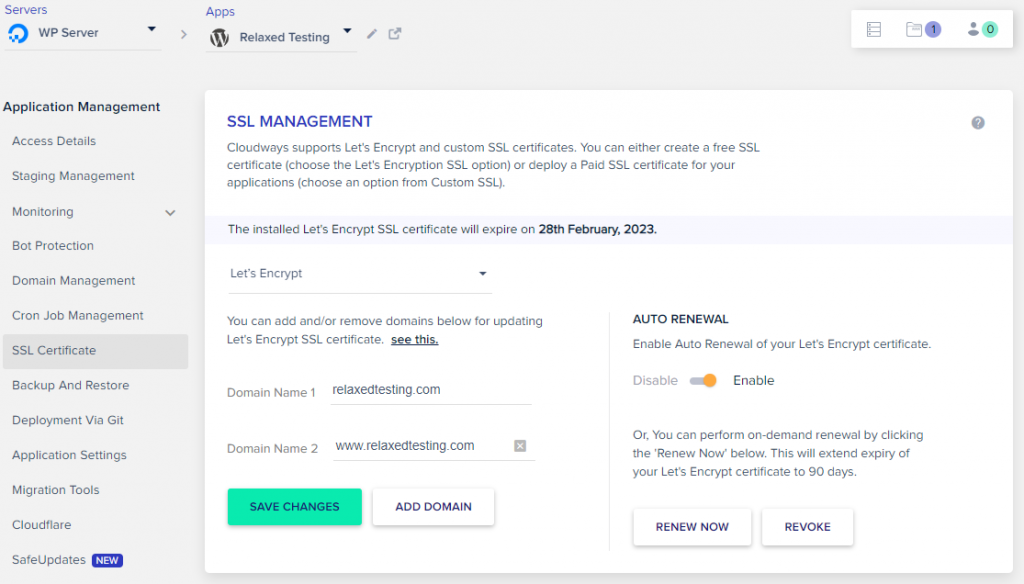
From here on, we secured our WordPress website with SSL which is accessible from HTTPS.
Cloudflare CDN
Cloudflare is a global network designed to make everything you connect to the Internet secure, private, fast, and reliable. By integrating Cloudflare Enterprise, you gain access to 200+ unique locations for Global Content Delivery Network, an intelligent website firewall along with many performance and security features. To enable Cloudways CDN, go to Applications / Cloudflare, enter the domain associated with your application, choose the plan to use, and click on Enable.
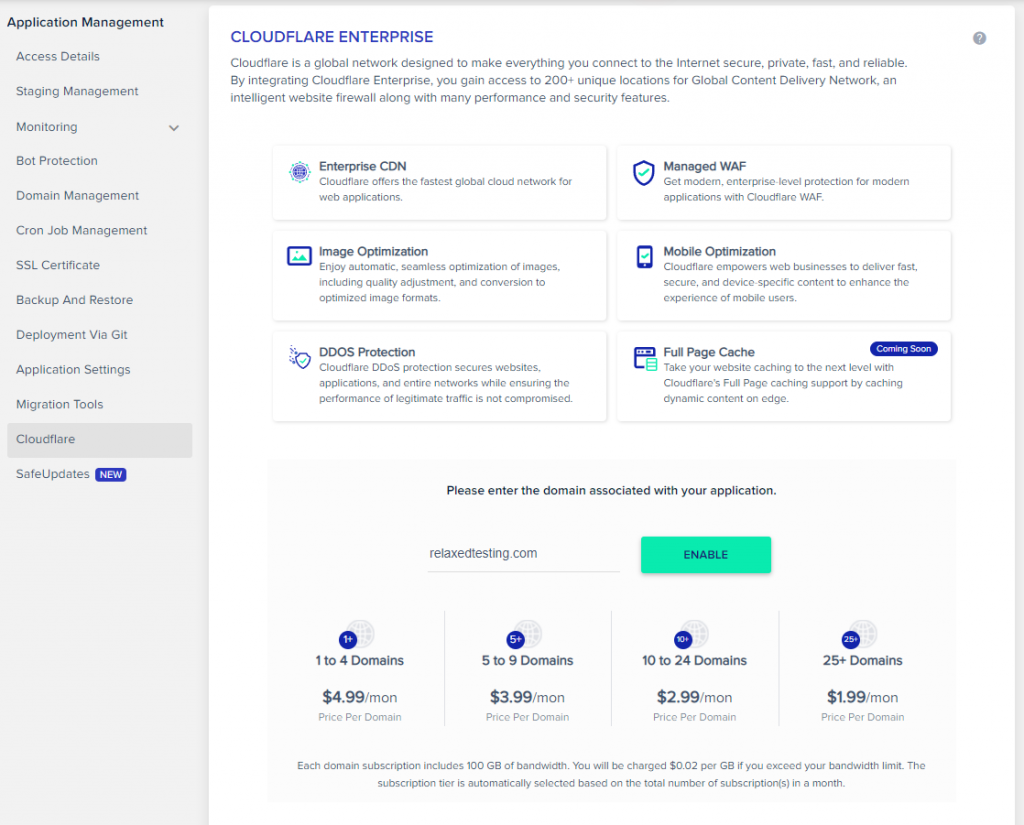
Cloudflare is not offered as a free version by Cloudways , you can find a tutorial on how to use the free version of Cloudflare here .
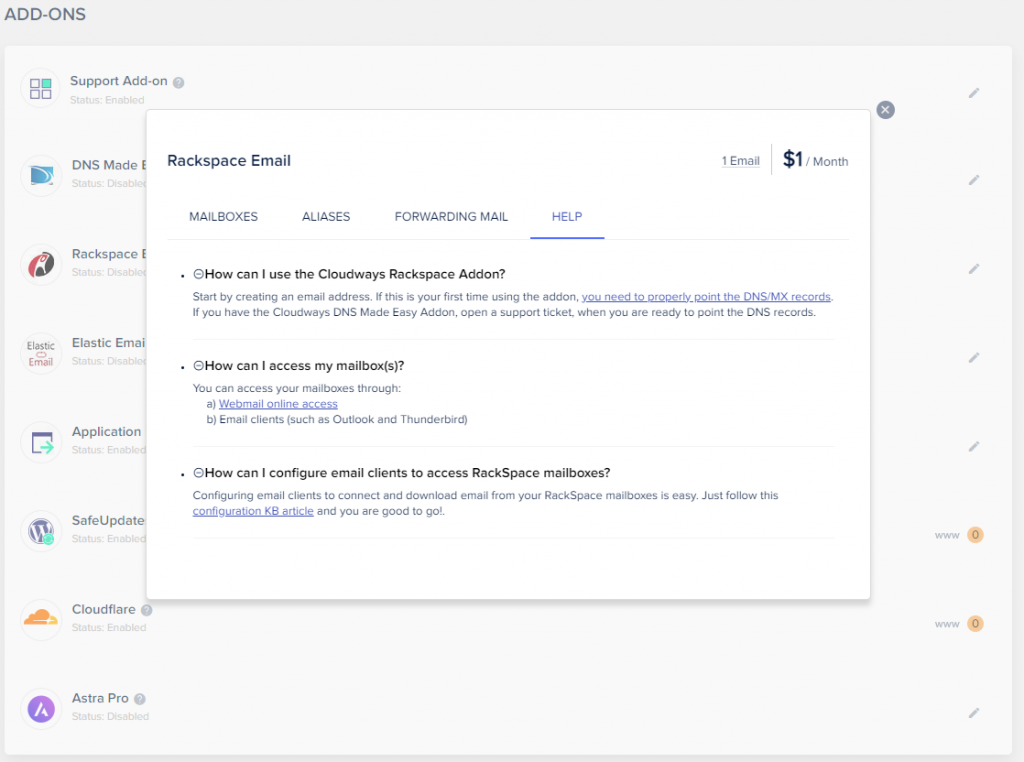
Cloudways Email
By default, Cloudways doesn’t include Email hosting but it does offer an addon for this. To enable Email hosting, go to More Options / Add-Ons and choose Rackspace Email. This Email Hosting Service will cost $1 for one email address.
Cloudways Staging WordPress
Cloudways Staging gives you an isolated environment where you can test new code, plugins, and themes without breaking your live site. Creating a staging site will create a copy of your live site. Once you are ready, you can push selective or complete changes to your live site with the push of a button. You can also pull from the live site to update your staging site to sync it before working on it.
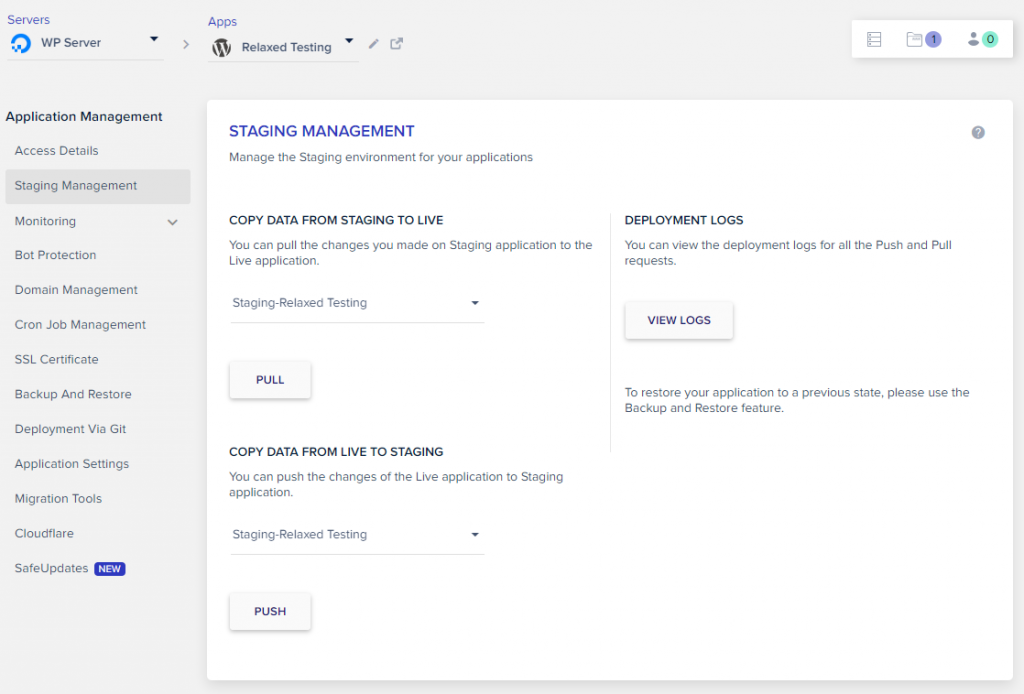
Launching a staging environment is very easy. Go to Applications / Staging Management / Launch Staging Application. Here we can choose the server where to deploy the WordPress staging website.
After we launch a Cloudways Staging WordPress environment, these are the options we have.
Other Cloudways Options
Besides the options we used above, Cloudways is offering a series of other helpful options.
- Monitoring Analytics and Logs.
- Bot Protection – ensures that your WordPress website remains completely safe and secure. It blocks hackers & bots before they harm your site.
- Cron Job Manager for your application.
- Backup and Restore – This section allows you to back up and restore application data (files and database). You can create multiple on-demand backups. In addition, Cloudways offers an option for scheduled and on-demand Server level backup that backs up all the applications deployed on the server.
- Deploy code via Git
- Application Settings – configure several application-specific settings for your web app.
- Migration Tool – bring your application to Cloudways Cloud Platform without any hardships. Our Migration tool will help you swiftly move your application’s data and database to your new cloud server.
- Safe Updates – makes use of reliable workflows to identify, schedule, and perform updates on your WordPress application, Themes, and Plugins. You may update your applications instantaneously at any time or may automate them to run periodically at a pre-selected time. Keeping your WordPress application, Themes, and Plugins up to date with the latest versions ensures the performance of your site and keeps it safe from security risks and vulnerabilities.
Video Tutorial
Subscribe to my newsletter
Subscribe to Relaxed Coder and be up to date with the latest articles.
Thank you for reading my article and I hope it will help you. If you have any questions or just want to say hi, please use the comments section below.

No comments yet.