How to run C# in Visual Studio Code
As the well-organized programmers we tend to be, we will start our journey by first setting up the tool that will help us learn and develop software.
The primary programming language we will use is C#. The tool to help us achieve our objectives is Visual Studio Code. Why are we using C#? Let’s ask the question with a joke:
“Why did the programmer have glasses?
So that he could C#”
In this post, we will learn how to install Visual Studio Code. Further on, configure the necessary extensions, and run our first .NET application.
What is Visual Studio Code?
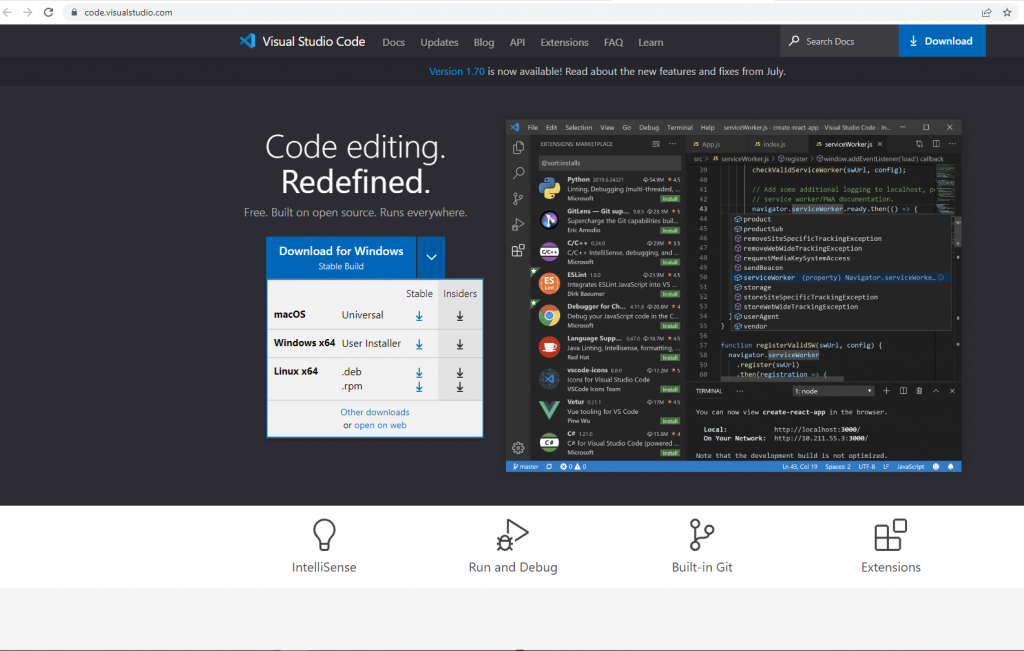
From code.visualstudio.com , we find that Visual Studio Code is a streamlined code editor. It offers support for development operations like debugging, task running, and version control. It aims to provide the tools a developer needs for a quick code-build-debug cycle.
VS Code is free for private or commercial use. VS Code offers three options for installation: macOS, Linux, and Windows. You can find more on how to download and install it below.
Visual Studio IDE is the best alternative to VS Code for developing C# .NET applications.
Download and install Visual Studio Code
To download VS Code, go to code.visualstudio.com and download the version according to your operating system. Remember what we mentioned before VS Code is available for macOS, Linux, and Windows. In our learn .NET journey I will use Windows OS, so please bare with me.
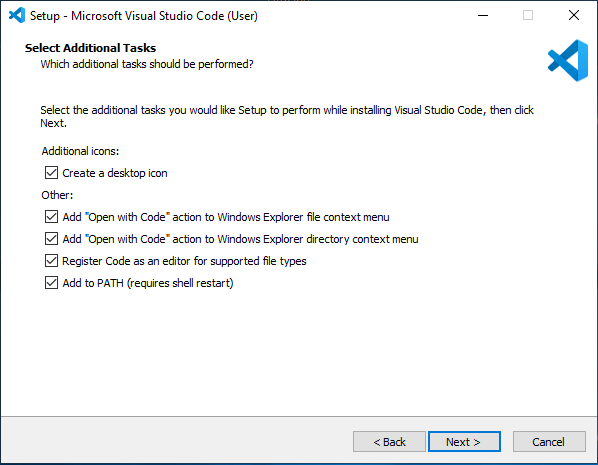
During the installation wizard, you can use the next button to the end or change some things. I prefer having the option “Open with code” enabled to open existing projects from Windows explorer. Another option I find helpful is the “Register Code as an editor for supported files”. This option allows me to open specific files easier with Code from Windows explorer.
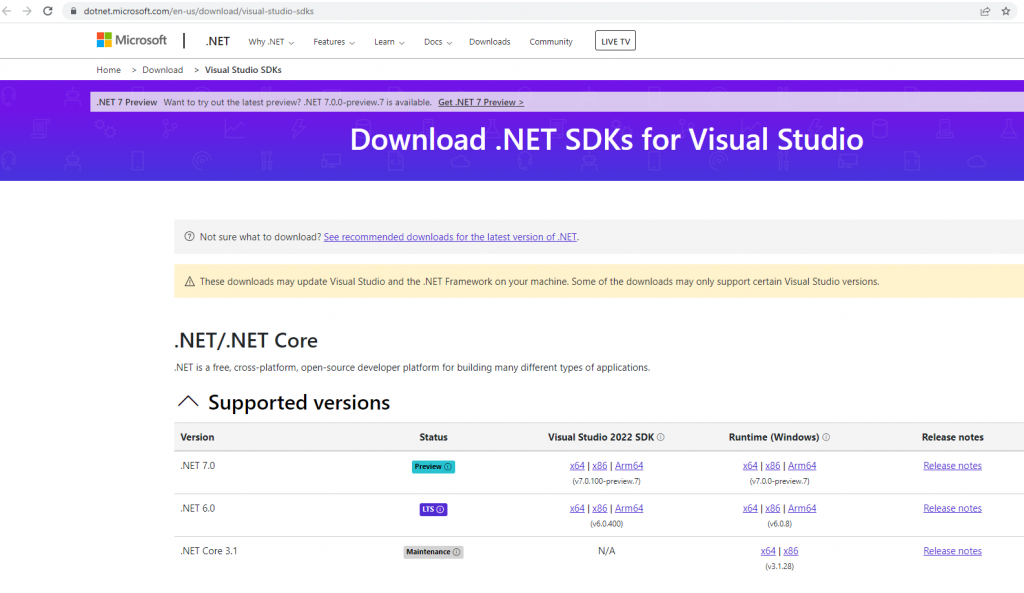
For our implementations, we will use the latest C# version together with the latest .NET version, currently at version 6. Further on we will proceed with the installation of .NET 6 SDK. You can find the SDKs here https://dotnet.microsoft.com/en-us/download/visual-studio-sdks .
First, we choose the wanted version, download it, and complete the installation. After we installed .NET 6 SDK we can check the versions installed on our machine using Command Prompt and the following command:
dotnet --info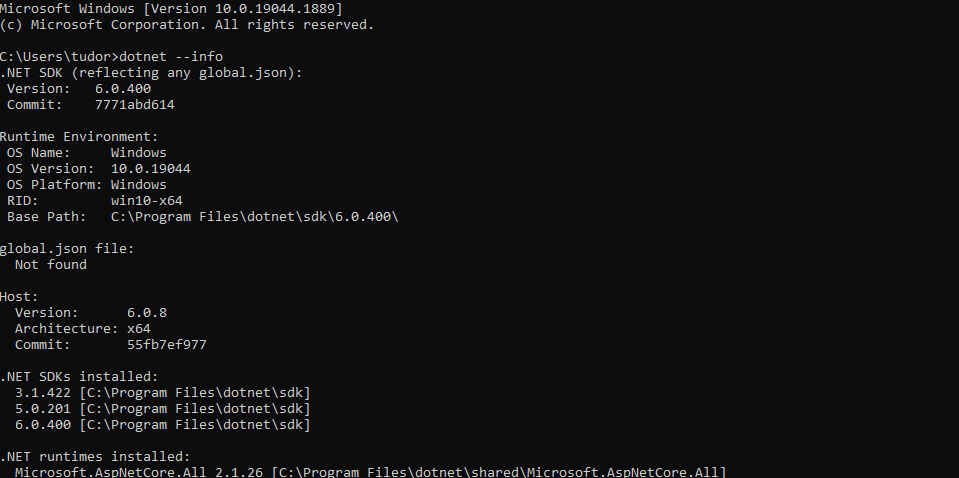
In my case, you can see I have installed many versions of .NET SDK, among them version 6.
What extensions do I recommend for developing .NET applications in Visual Studio Code
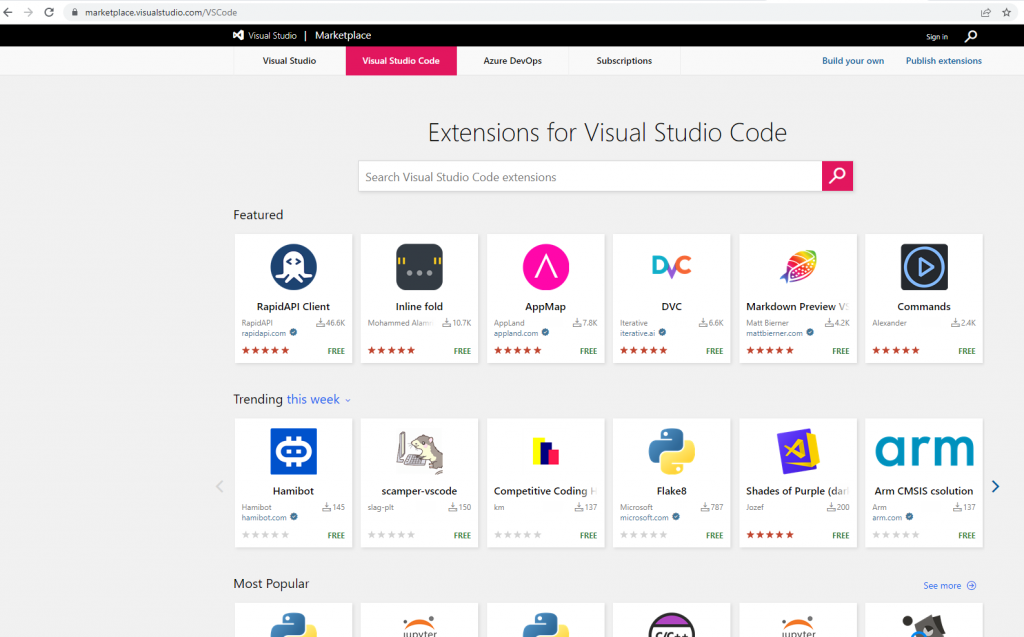
Once we have installed Visual Studio Code we can proceed further with the installation of the useful extensions. There are two ways to install a new extension to Visual Studio Code. One is using Visual Studio Code Marketplace
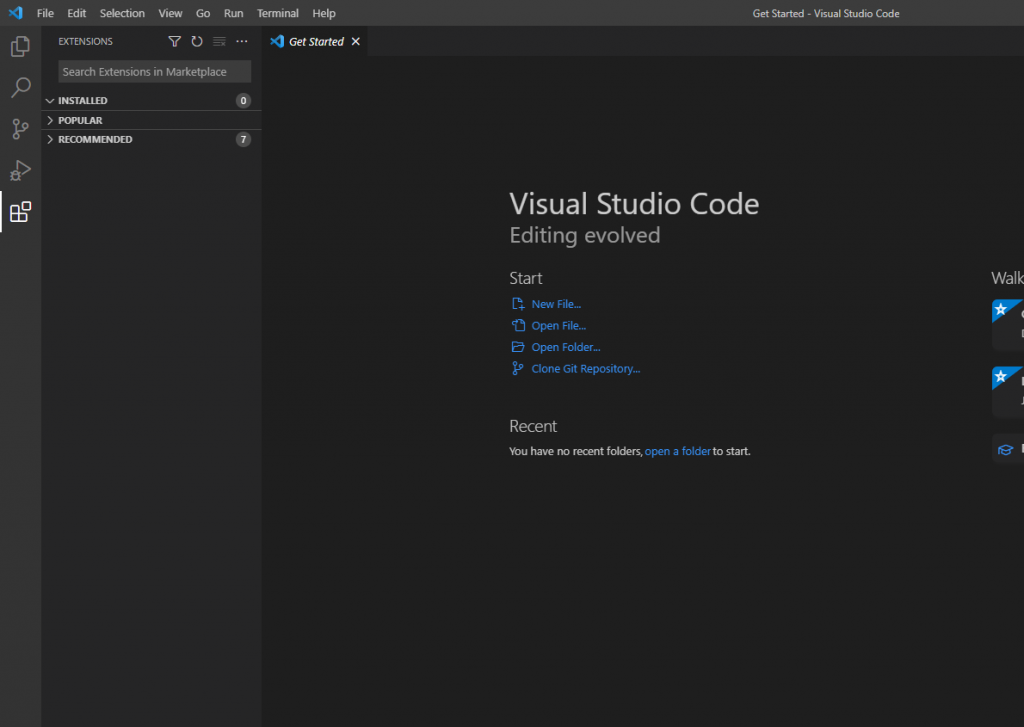
The other one is from the Extensions section in Visual Studio Code itself.
Here are the Visual Studio Code extensions I recommend for developing .NET C# applications:
- C# for Visual Studio Code (powered by OmniSharp) – this is a must-have extension as we will develop applications in the C# language.
- GitLens
- Supercharge Git within VS Code
- Visualize code authorship at a glance via Git blame annotations and CodeLens
- Navigate and explore Git repositories
- Gain valuable insights via rich visualizations and powerful comparison commands, and so much more
- Git History – View git log, file history, compare branches or commits
- Code Spell Checker – writing in a hurry can produce some spelling errors in your variable or class names. Why not use a basic spell checker that works well with code and documents? The goal of this spell checker is to help catch common spelling errors while keeping the number of false positives low.
5 time-saving extensions for Visual Studio Code
Subscribe to Relaxed Coder and get an email with 5 time-saving extensions for Visual Studio Code.
Our first .net application using Visual Studio Code
So far we have installed, configured, and prepared the environment. Now is the time to create our first .NET C# application.
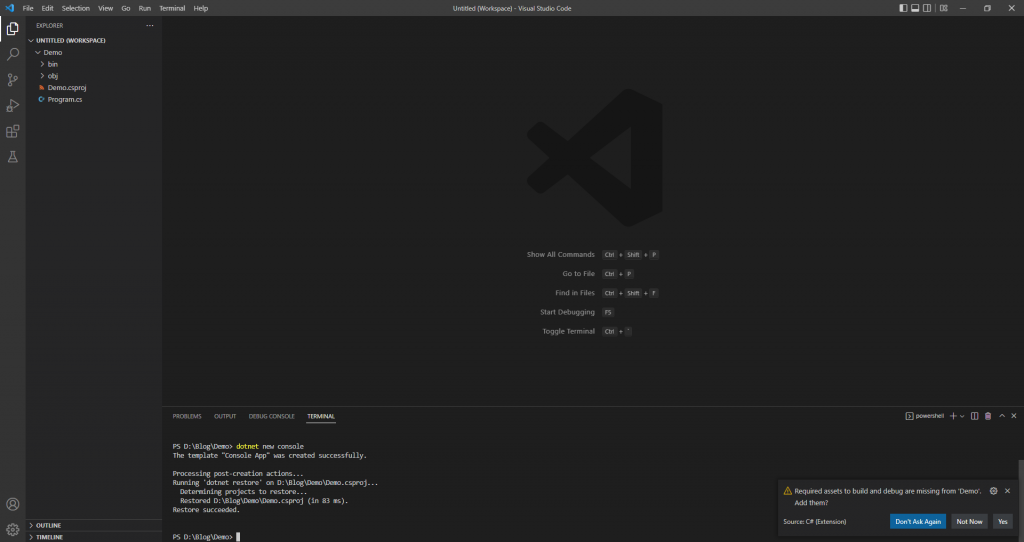
These are the 5 steps for creating our first .NET application using Visual Studio Code:
- Create a new folder where you want to create the brand new .NET application
- Open the application folder location in Visual Studio Code

- Go to View > Terminal to display the terminal window
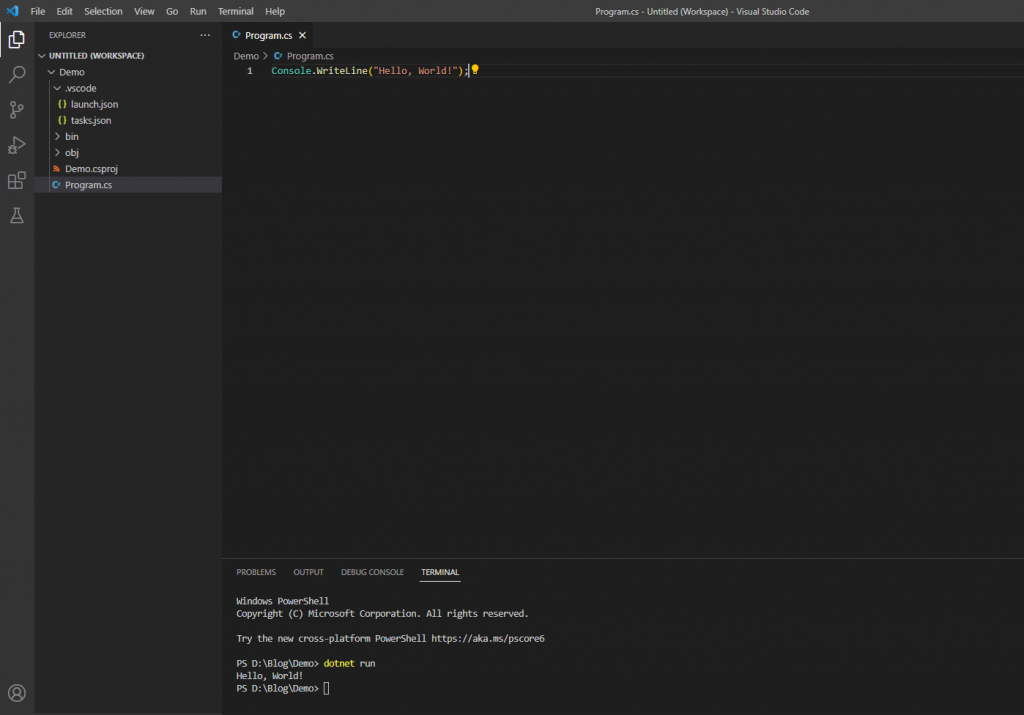
- Use the following command in the Terminal to create a new .NET C# console application: dotnet new console
- To run the application we will use the following command: dotnet run
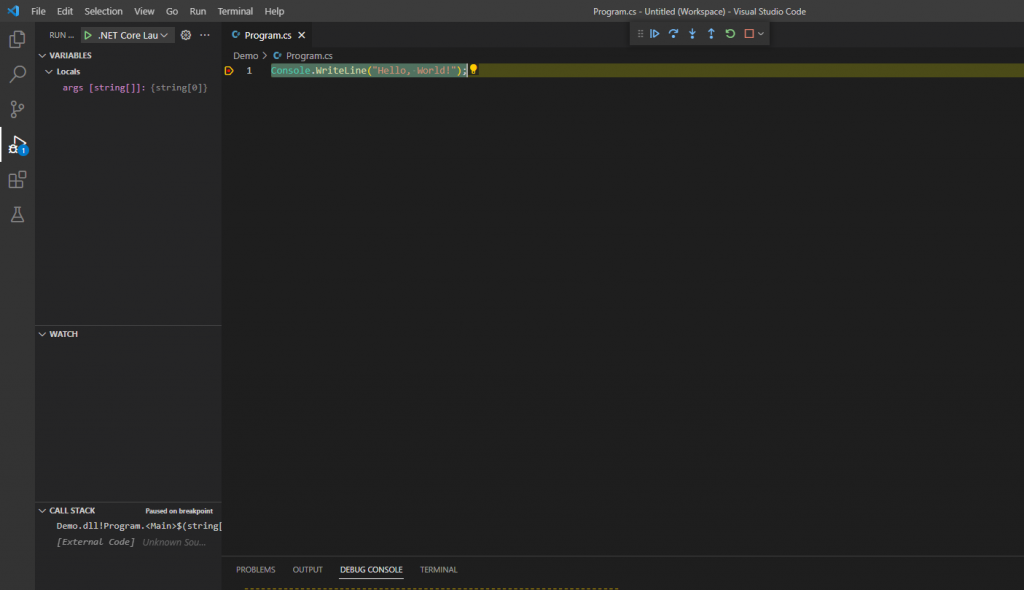
- Debug the application. Before debugging ask yourself: Are the assets for build and debug generated? (this is what we mentioned in step 4 with the asterisk). Go to View > Command Palette (Ctrl+Shift+P) and search for “.NET: Generate Assets for Build and Debug”. This will generate a .vscode folder with the build configuration JSON files. Now we are ready to start debugging. Go to Run > Debugging (F5) and voila.
We created our application by using a template. Let’s have a quick look over what files and folders we have.
Bin Folder – holds binary files, which are the actual executable code for your application or library. Each of the folders within the bin folder is further subdivided into Debug and Release folders. These sub-folders correspond to the project’s build configurations.
Obj folder – stores temporary object files and other files used to create the final binary.
Demo.csproj file – in the documentation provided by Microsoft we find out that the project files lie at the heart of the build and deployment process. It describes the key components you’ll come across when you work with project files. It works through an example of how you can use project files to deploy real-world applications. If you want to go into more details about csproj files you can find a detailed article here.
Program.cs file – this CSharp file contains the actual code that is running. This is the main entrance to our application and, in this first application, we have all our code written.
That’s all for now. If you have any questions, suggestions, or improvements please let me know in the comments section below.
