Tutorial: Easy deploy of .NET Core to Linux on Linode
Today we will look over how to deploy .NET Core Web API or application on Linux using Linode Cloud and aaPanel.
With the deploy method used in this article, we won’t be able to configure everything we need by using aaPanel. We will need to write some lines of code, including in the Linux terminal.
I did another article a while ago to demonstrate how to deploy a .NET Core Web API to Linux. In that article, I wanted to show a way to deploy .NET Core to Linux without needing to connect to the Linux terminal.
About Linode
Before going into the actual tutorial, let’s talk a bit about the cloud provider we will use in this tutorial.
Linode is an American cloud hosting provider that focuses on providing Linux-powered virtual machines to support a wide range of applications. It was acquired by Akamai Technologies on March 21, 2022.
Back in 2003, at the time of its launch, Linode was considered ahead of its time with virtualization hosting. It has grown into a multinational corporation serving more than 800,000 customers from 196 countries. Linode server locations are optimized for serving a global audience by reducing latency and improving UX.
If you want to find out more, go ahead and visit the Linode website.
Host your .NET Core Applications with Linode
Create an account on Linode and receive $100 to test the platform.
About aaPanel
aaPanel is a Chinese alternative to a web server control panel like cPanel and Vesta. It was developed by BT.cn, it is free (it also offers a paid pro version), mature enough, and features some really nice stuff like an editor, uploader, file manager, backups and Nginx preconfigured rules. Also, it is user-friendly and offers GUI for most essential Linux services, making your job managing a web server easier. You can find out more about aaPanel by visiting their website at aaPanel.com .
Deploying a .NET Core Web API to Linux with Linode and aaPanel
Before getting into it let’s see what we need to deploy. Well, in a previous article, we learned how to create a .NET Core Web API with a MySql database. You can find the code we will deploy in this tutorial here .
When deploying a Web API and a database we have two approaches to the resources that we will use. One would be to deploy the API and the database to the same server and the second one is to deploy them to separate servers. The first option has the advantage that is cheaper at the beginning. The second option has the advantage that it scales easier once our application usage is growing.
Deploy new Linode
Linode names their Virtual Machines linodes 🙂. For our tutorial, we will deploy a new linode and start configuring it. Don’t have a Linode account yet? Create a new account and receive $100 in credit to see if Linode works for you.
- Log in to your Linode account
- Go to Linodes / Create Linode
- From the Marketplace choose aaPanel
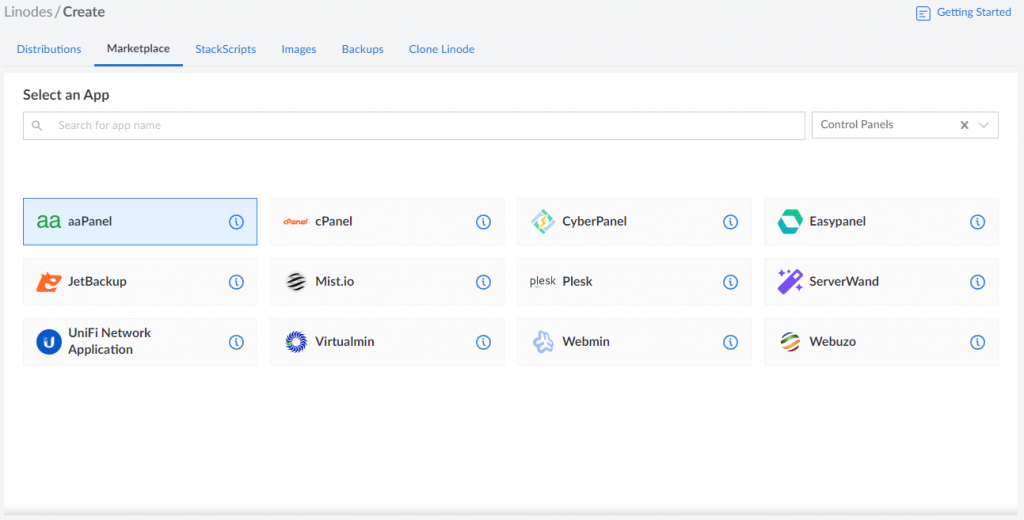
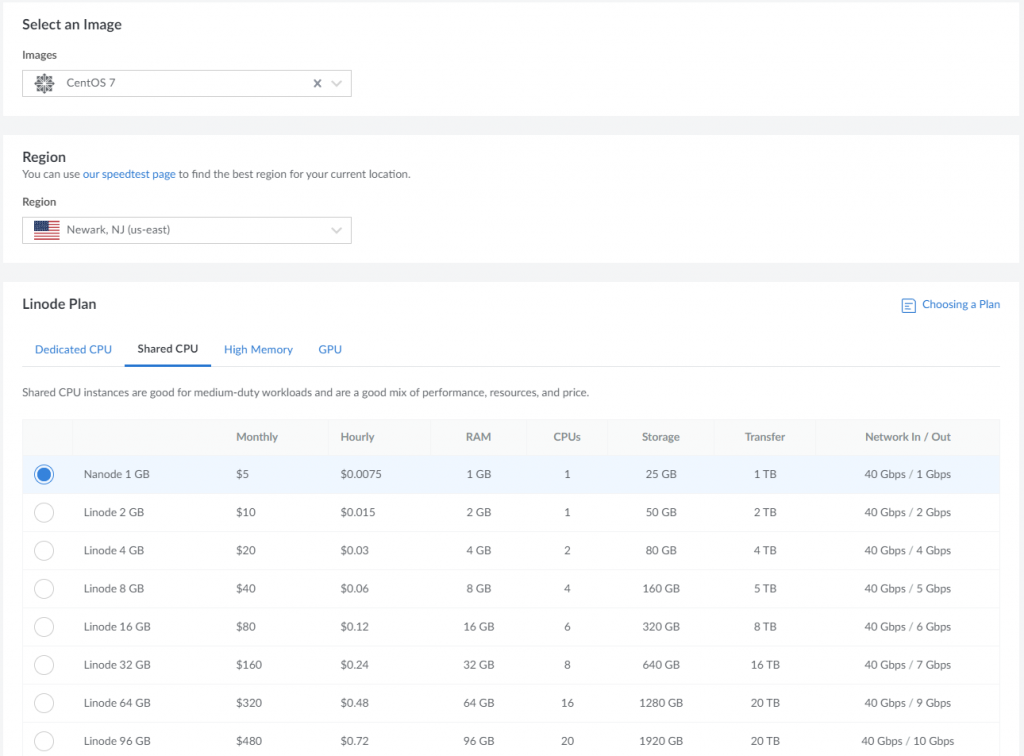
- Select an image, Operating System, region, and Linode plan
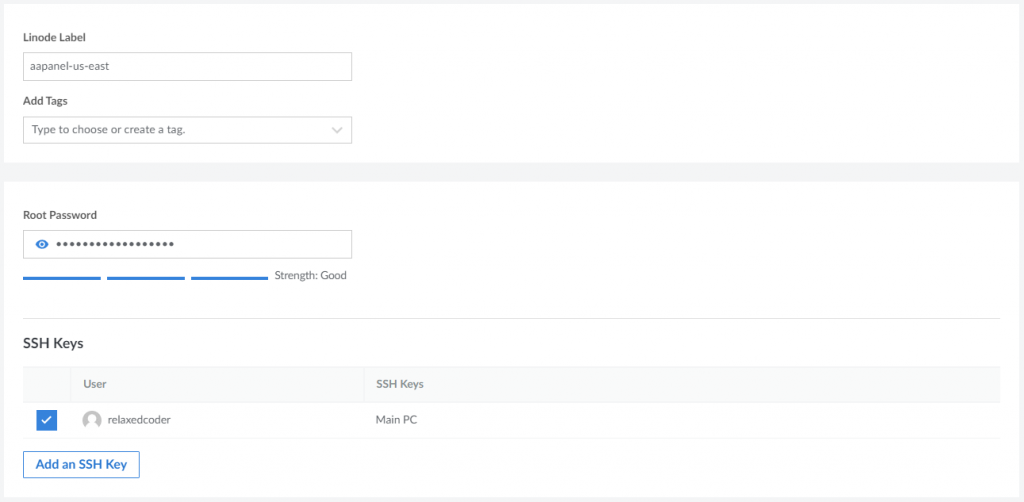
- Add labels, tags, root password, and SSH Key. The last one we will use to SSH connect to our virtual machine.
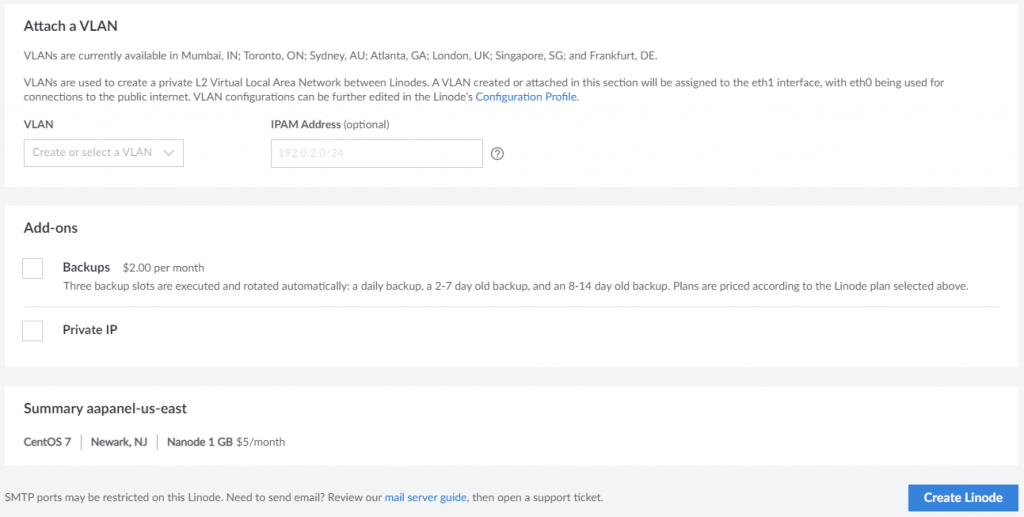
- Attach a VLAN, and other addons and create the Linode
The virtual machine creates in less than one minute but the installation of aaPanel will take around 5 minutes. You can check the status of the installation by using the Launch LISH Console option from Linode . After the aaPanel installation finishes, in the console you should see something like this:
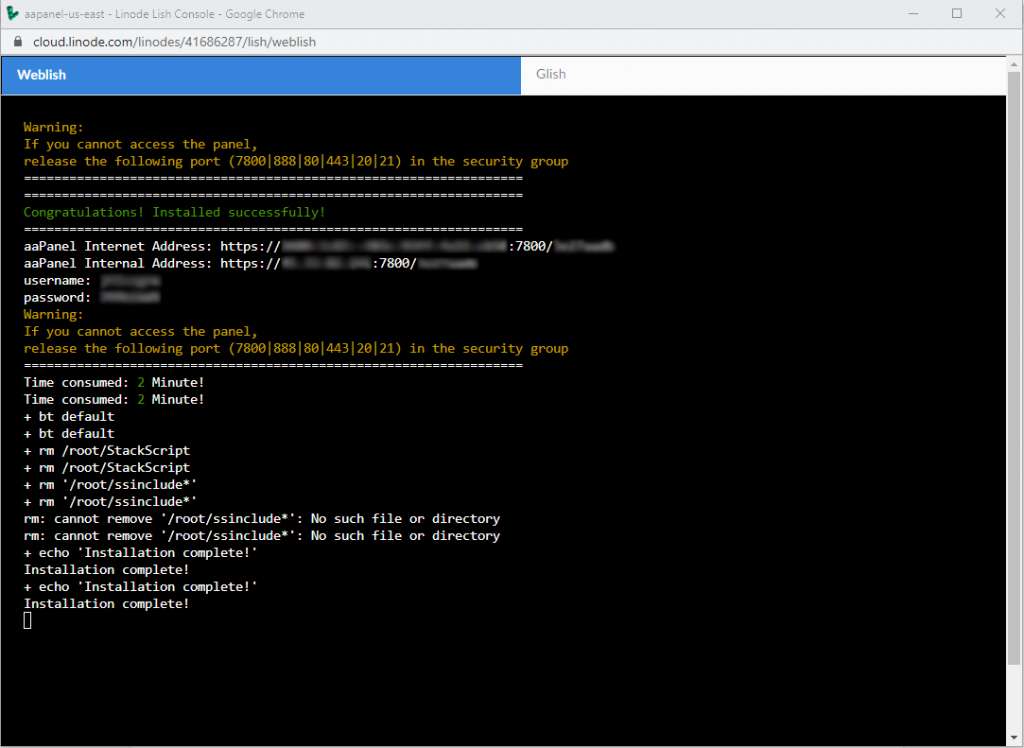
In order to access the aaPanel we can use the internal address provided after the installation. If for some reason the HTTPS address is not working, use HTTP instead. For username and password, use the username and password provided after the installation.
Configure aaPanel
When we log in for the first time to aaPanel there is a prompt to configure the server. We have two recommended software packages.
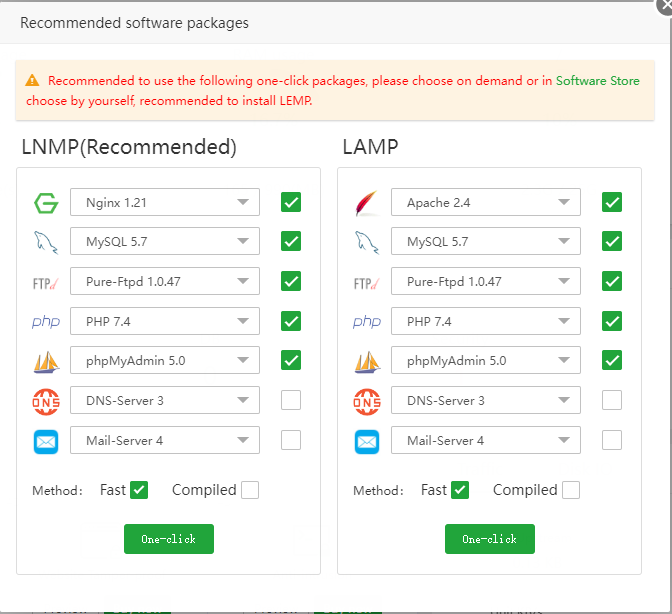
For this tutorial, we will use LNMP package. The installation, using the fast method will take around 5 to 10 minutes.
Create a new website
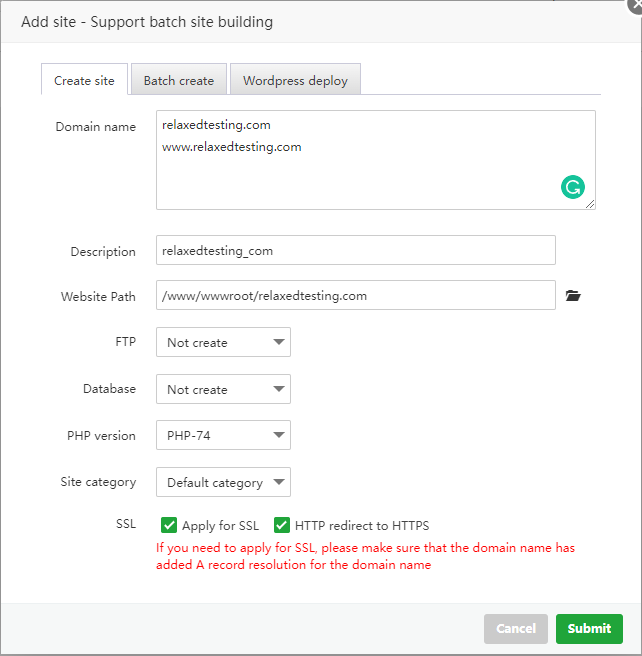
In aaPanel go to Websites and create a new website under PHP project.
Configure DNS
For the configuration of DNS we need to go to our DNS provider and configure two records. In my case, I am using Namecheap .
You have two options to manage DNS with Namecheap. Free DNS – keep your online presence. FreeDNS hosting makes sure your domain is visible to the Internet, and with secondary DNS backup avoids any gaps in your website’s availability. The second option is Premium DNS – this service will always be on duty, easily able to monitor and intuitively secure DNS hosting on your behalf. Get DNS Security Extensions (DNSSEC) support to combat DNS attacks, super-fast DNS speeds with global Anycast servers handling the busiest of websites and your queries, and your website 100% available — for one hugely affordable price–per–year. Forget about lost connections and data leaks. Advanced DNS security with PremiumDNS has you covered. Don’t worry about the price of Premium DNS, at the moment is under $5/yr.
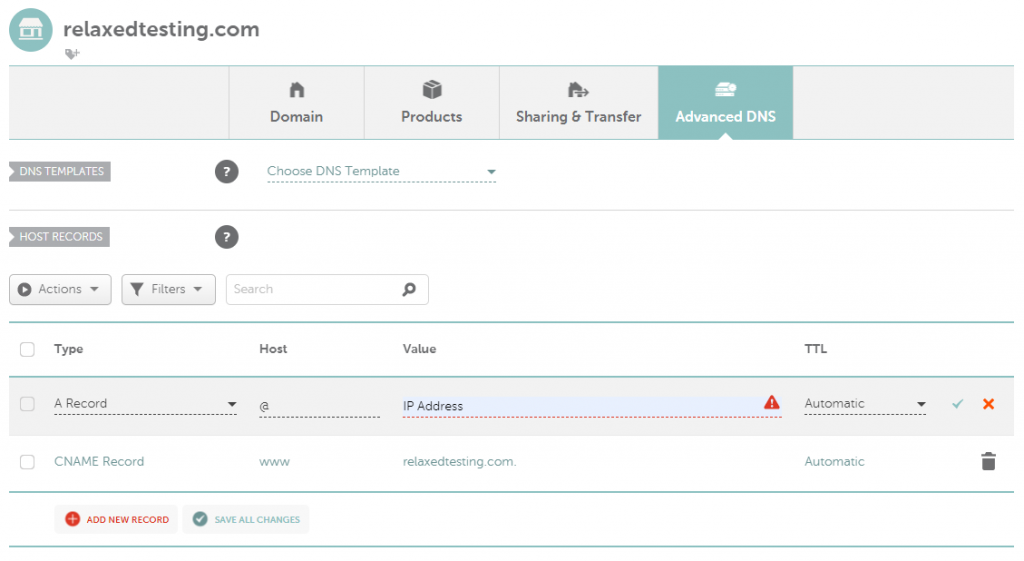
Go to your Namecheap account, choose to manage the domain you want to configure, and then Advanced DNS. Here we will configure the DNS Records that will resolve our domain. You should have something like below. Just add your IP address and replace relaxedtesting.com with your actual domain.
Configure SSL
For SSL we will use Let’s Encrypt. Besides the free version, you can also use a dedicated SSL certificate provider. For this I recommend SSLs .com.
SSLs .com is for everyone, whatever the size and scope of the project. From small business websites to niche blogs run by tiny teams or individuals with a small budget, they got you covered. You don’t need to worry about spending a fortune or facing a steep technical learning curve. So you can focus on making your vision a reality, safe in the knowledge that your site is safe and secure. You can find SSL certificates on SSLs .com for less than $4/yr.
To configure SSL for our new website we need to go to website configuration and under SSL configure Lets Encrypt to look something like below.
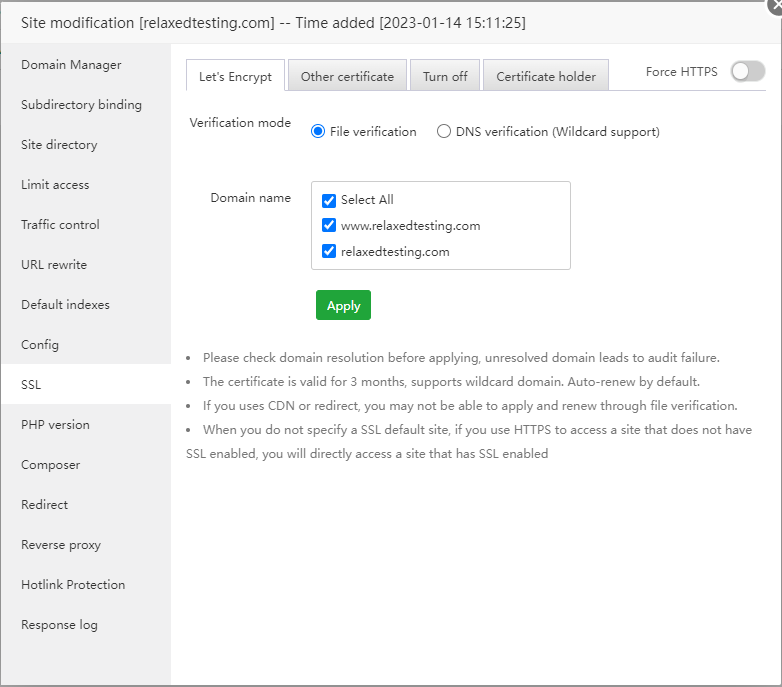
Clicking Apply configures the SSL certificate and we can now Force HTTPS on our website.

Deploy .NET Core Web API on aaPanel
So far we didn’t need to use the Linux terminal, but now we will need it to install the .NET Core runtime. We can use the terminal provided inside the aaPanel. For logging in use the private key from the SSH used when configuring the Linode .
Install .NET Runtime
The .NET Core Web API example for this tutorial is using .NET 6. During the VM deployment of aaPanel we used CentOS 7 so for the installation of .NET Runtime we will use CentOS commands.
sudo rpm -Uvh https://packages.microsoft.com/config/centos/7/packages-microsoft-prod.rpm
sudo yum install aspnetcore-runtime-6.0
Upload .NET Core Web API publish files
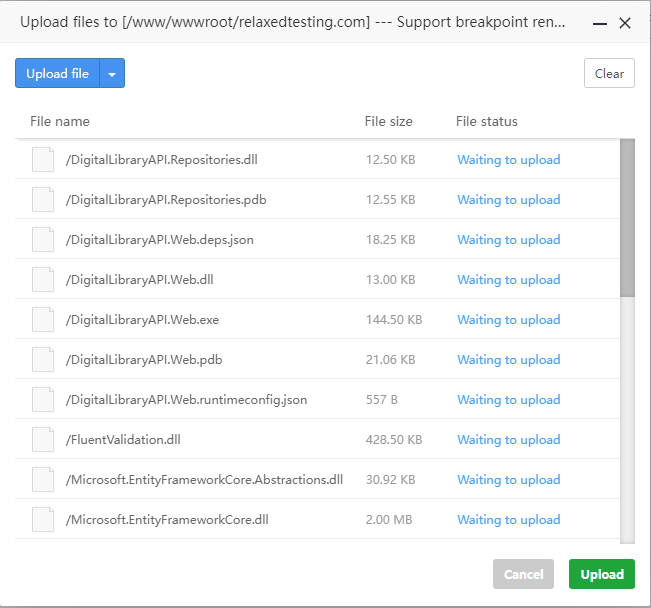
Now let’s go further and copy the published .NET Core Web API files to our new website. For this, we can use the file manager provided by aaPanel. Locate the website files in /www/wwwroot/yourdomain. Before copying the published files, delete all the existing files.
Configure Nginx
Kestrel is great for serving dynamic content from ASP.NET Core. However, the web serving capabilities aren’t as feature-rich as servers such as IIS, Apache, or Nginx. A reverse proxy server can offload work such as serving static content, caching requests, compressing requests, and HTTPS termination from the HTTP server. A reverse proxy server may reside on a dedicated machine or may be deployed alongside an HTTP server.
To configure Nginx as a reverse proxy for our website, go to Websites and under the configuration of our website, we have a Config section. This is the primary configuration file of the site and here we will be able to add some rules for reverse proxy. First, remove the rules for images and js|css, and then add the following rule:
   location / {
    proxy_pass http://0.0.0.0:5000;
    proxy_redirect off;
    proxy_set_header Host $host;
    proxy_set_header X-Real-IP $remote_addr;
    proxy_set_header X-Forwarded-For $proxy_add_x_forwarded_for;
    proxy_set_header X-Forwarded-Proto $scheme;
}
Here is how my config file looks:
server
{
    listen 80;
    listen 443 ssl http2;
    listen [::]:443 ssl http2;
    listen [::]:80;
    server_name relaxedtesting.com www.relaxedtesting.com;
    index index.php index.html index.htm default.php default.htm default.html;
    root /www/wwwroot/relaxedtesting.com;
    #SSL-START SSL related configuration, do NOT delete or modify the next line of commented-out 404 rules
    #error_page 404/404.html;
    #HTTP_TO_HTTPS_START
    if ($server_port !~ 443){
        rewrite ^(/.*)$ https://$host$1 permanent;
    }
    #HTTP_TO_HTTPS_END
    ssl_certificate    /www/server/panel/vhost/cert/relaxedtesting.com/fullchain.pem;
    ssl_certificate_key    /www/server/panel/vhost/cert/relaxedtesting.com/privkey.pem;
    ssl_protocols TLSv1.1 TLSv1.2 TLSv1.3;
    ssl_ciphers hidden;
    ssl_prefer_server_ciphers on;
    ssl_session_cache shared:SSL:10m;
    ssl_session_timeout 10m;
    add_header Strict-Transport-Security "max-age=31536000";
    error_page 497  https://$host$request_uri;
    #SSL-END
    #ERROR-PAGE-START  Error page configuration, allowed to be commented, deleted or modified
    #error_page 404 /404.html;
    #error_page 502 /502.html;
    #ERROR-PAGE-END
    #PHP-INFO-START  PHP reference configuration, allowed to be commented, deleted or modified
    include enable-php-74.conf;
    #PHP-INFO-END
    #REWRITE-START URL rewrite rule reference, any modification will invalidate the rewrite rules set by the panel
    include /www/server/panel/vhost/rewrite/relaxedtesting.com.conf;
    #REWRITE-END
    # Forbidden files or directories
    location ~ ^/(.user.ini|.htaccess|.git|.svn|.project|LICENSE|README.md)
    {
        return 404;
    }
    # Directory verification related settings for one-click application for SSL certificate
    location ~ .well-known{
        allow all;
    }
        location / {
    proxy_pass http://0.0.0.0:5000;
    proxy_redirect off;
    proxy_set_header Host $host;
    proxy_set_header X-Real-IP $remote_addr;
    proxy_set_header X-Forwarded-For $proxy_add_x_forwarded_for;
    proxy_set_header X-Forwarded-Proto $scheme;
}
    access_log  /www/wwwlogs/relaxedtesting.com.log;
    error_log  /www/wwwlogs/relaxedtesting.com.error.log;
}
Create new service
Next up we will create a service that will take care of starting our .NET Core Web API automatically. We can do this from the Linux terminal but we can take advantage of the aaPanel File Manager and editor.
From the aaPanel Files section, navigate to /etc/systemd/system, create a new blank file and give it a name (something like yourapp.service). In my case I named it digitallibrary.service.
Open the service file by double-clicking on it and paste the following content into it:
[Unit]
Description=Digital Library API example service
[Service]
WorkingDirectory=/www/wwwroot/relaxedtesting.com
ExecStart=/usr/share/dotnet/dotnet /www/wwwroot/relaxedtesting.com/DigitalLibraryAPI.Web.dll
Restart=always
# Restart service after 10 seconds if the dotnet service crashes:
RestartSec=10
KillSignal=SIGINT
SyslogIdentifier=dotnet-digitallibrary-api
User=www
Environment=ASPNETCORE_ENVIRONMENT=Production
Environment=DOTNET_PRINT_TELEMETRY_MESSAGE=false
[Install]
WantedBy=multi-user.target
Before saving the file, don’t forget to replace the domain and the dll name.
Start the service
Now that we have created a new service that will take care of starting our Web API, it’s time to enable and start our new service. We will use the aaPanel terminal once again. Go to the terminal and use the following two commands:
sudo systemctl enable digitallibrary.service
sudo systemctl start digitallibrary.service
We can check if the service is up and running by using this command:
sudo systemctl status digitallibrary.serviceConfigure MySQL
This will be very easy and straightforward. From aaPanel, go to Databases and add a new database.
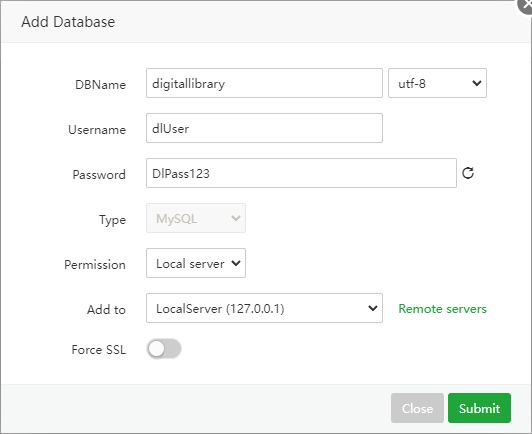
From here on we can import a backup of our database and start using the .NET Core Web API from our brand-new Linode server.
Video Tutorial
Subscribe to my newsletter
Subscribe to Relaxed Coder and be up to date with the latest articles.
Conclusions
In this article, we learned how to deploy a .NET Core Web API to Linux using Linode and aaPanel. You can use the same process for deploying .NET Core Web Apps. Thank you for reading this article and if you have any questions please let me know in the comments section below.
